Example Scenario
In this scenario, you have a district with 10 schools and need to place 5 of them into lockdown. You use the Multi-Alert feature to send a lockdown alert to those 5 schools at once. This action creates 5 separate alerts that are triggered simultaneously. The alerts are not combined into a single alert—each school receives its own alert. Multi-Alert simply provides a faster way to send a shared alert type to multiple groups.
What Is Multi-Alert?
Multi-Alert lets you:
-
Send one alert to multiple groups at once
-
Trigger alerts across multiple locations simultaneously
-
Manage each triggered alert individually after sending
Only workspace-level alert types can be sent as a Multi-Alert. Group-specific alert types are not available for Multi-Alert.
Important Permissions Information
-
Users can send a Multi-Alert to any group they are a member of.
-
If a staff member can send alerts and belongs to multiple groups, they can send Multi-Alerts to those groups.
-
Administrators who belong to all groups can send Multi-Alerts to all groups.
Be sure to consider group memberships when deciding who should have access to this feature.
How to Send a Multi-Alert
Follow the steps below to send a Multi-Alert:
Step 1: Start a Multi-Alert
-
From your dashboard, select Send Multi-Alert.
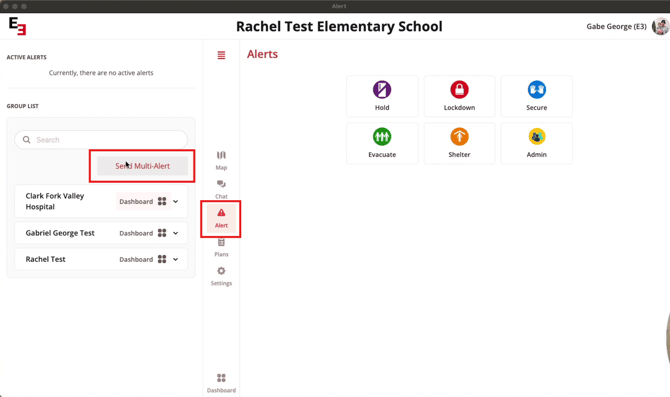
Multi-Alerts must be sent from this dropdown menu. They cannot be sent from the regular Alerts page.
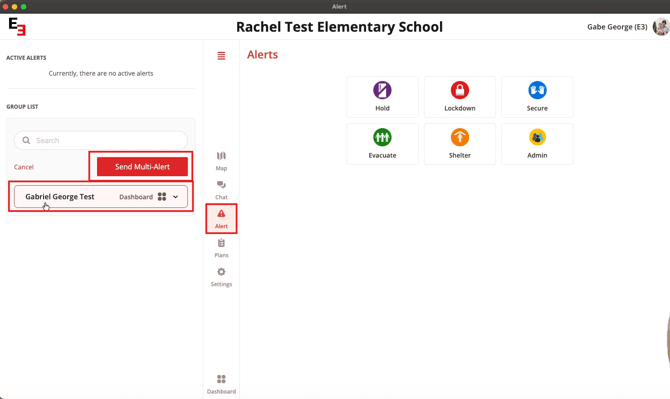
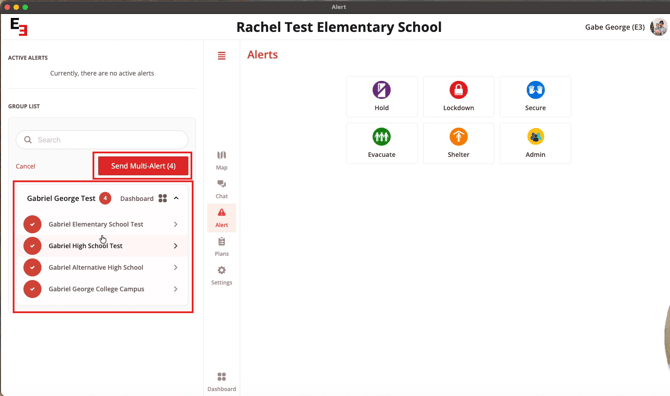
Step 2: Select Groups
-
Choose the groups you want to send the alert to.
-
Click Send Multi-Alert to continue.
Step 3: Select Alert Type
-
Choose from the available workspace-level alert types.
-
Select the alert type you want to send (e.g., Lockdown).
-
Click Next.
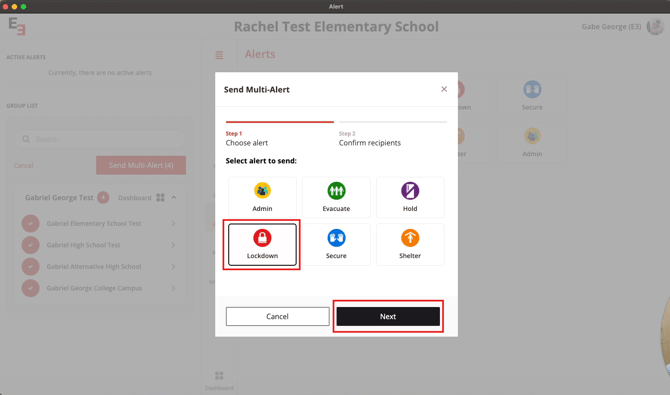
Note: Group-specific alert types will not appear in this list.
When creating a Multi-Alert, the default alert page may appear grayed out while the Multi-Alert workflow is active. This is expected behavior and indicates that the system is currently in Multi-Alert mode.

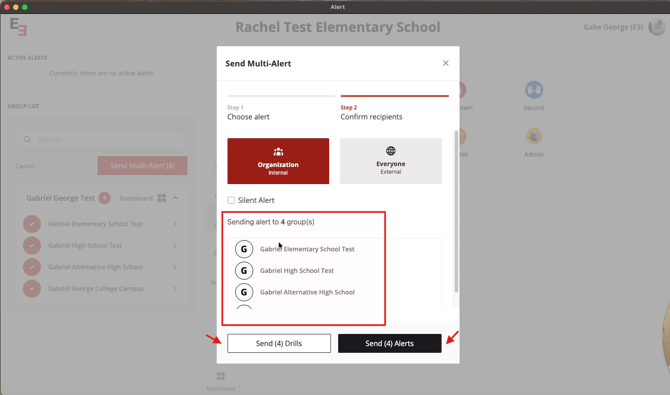
Step 4: Confirm Alert Details
Before sending, you will be asked to:
-
Confirm the selected groups
-
Choose whether to send the alert internally or externally
-
Confirm whether you are sending a live alert or a drill
Review your selections carefully, once confirmed, click Send.
Once sent:
- Separate active alerts will be created for each selected group/location.
- You can toggle between active alerts to manage them individually.
- Each alert operates independently
Step 5: Manage Active Alerts
Multiple active alerts will appear, and you can manage each one by selecting it. If you have admin permissions, you can end alerts as needed, but each alert must be ended individually. There is no shortcut to end all alerts. 
-
End alerts separately as needed

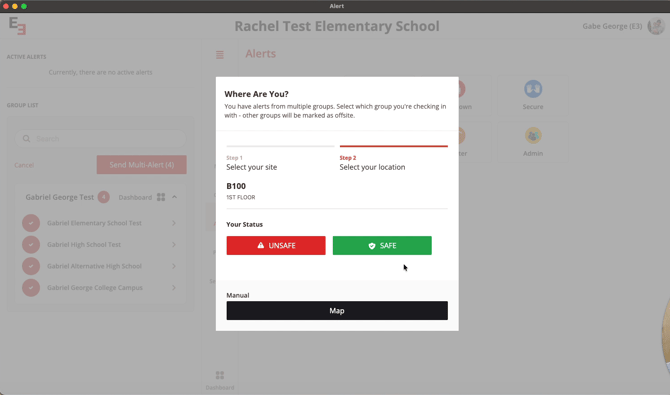
Checking in to Multi-Alerts
After sending the alert, you will be prompted to check in. To prevent you from having to check in to each group individually, E3 will first ask you to select your site and a location at that site. It will then automatically check you in to the remaining sites using the default location of Offsite.
Select your site, location and status.

Need more help?
💬 Chat with us.
Click the chat icon in the bottom-right corner of this page to connect with our team instantly.
✉️ Email us.
You can also send us an email at help@emergent3.com.