Jump to Section
How Roll Call works for Admin users
How to setup Roll Call for your organization
How to Take Roll
The Roll Call process begins automatically once an alert (that requires roll call) or drill is initiated in E3. This allows teachers to mark which students are accounted for, missing, or absent — directly in the app.
Step 1: Send or Receive an Alert
- An admin or staff member starts an emergency alert or drill
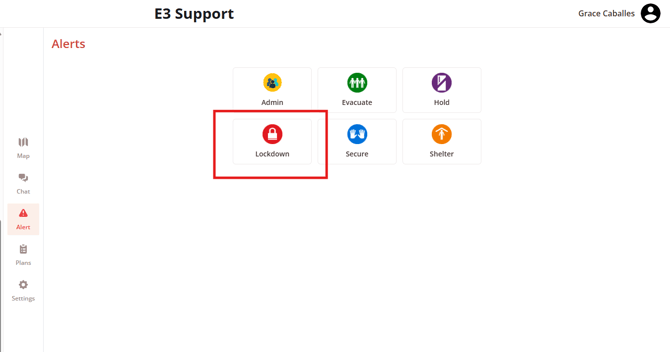
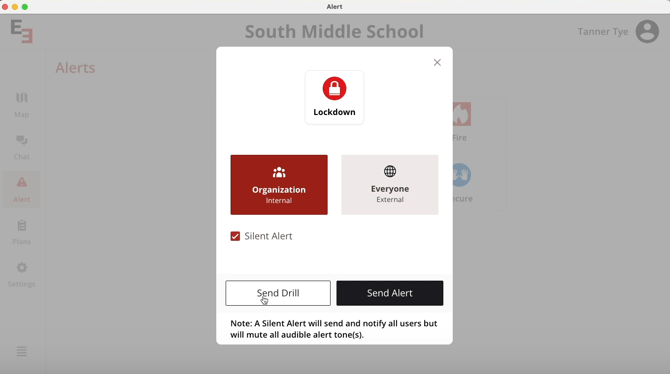
- Once the alert is sent, you’ll receive the usual prompts in E3.
Step 2: Confirm Your Location and Status
- You’ll be asked: “Where are you?”
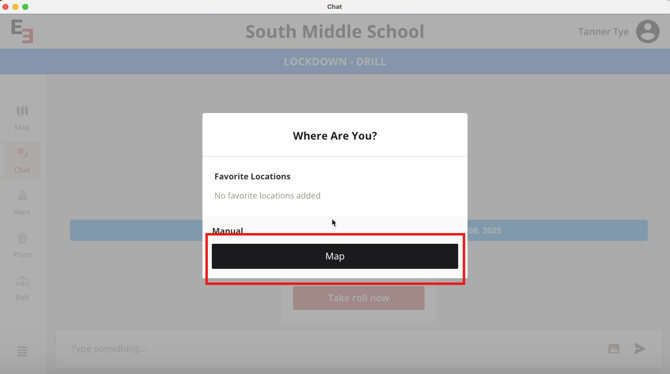
→ Tap on the map to select your location.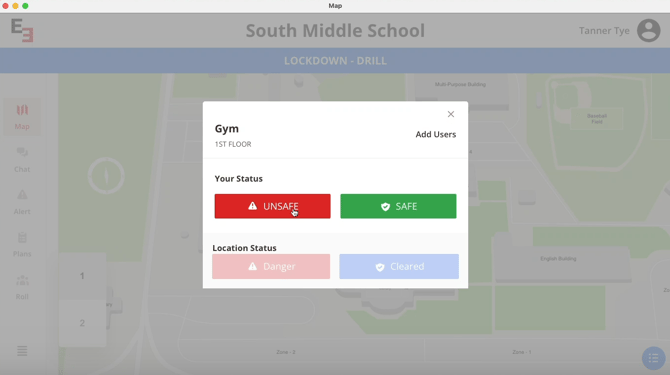
- Then select your status:
- Safe
- Unsafe
- Safe
After completing both steps, you’ll automatically be directed to your Chat Room.
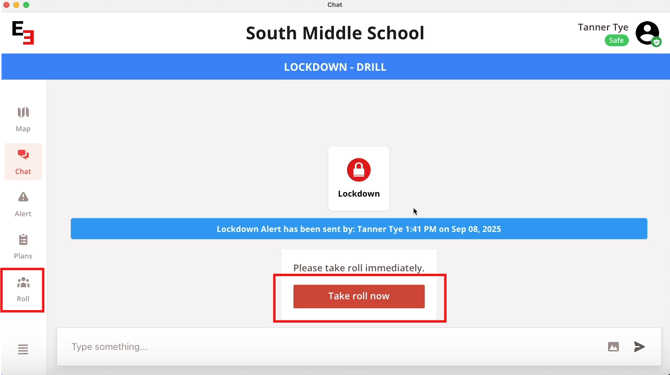
Step 3: Start Taking Roll
- Inside the chat room, you’ll see a message that says:
“Please take roll immediately.”
- You can begin Roll Call by:
-
Clicking Take Roll Now, or
-
Tapping the Roll icon in the navigation bar
-
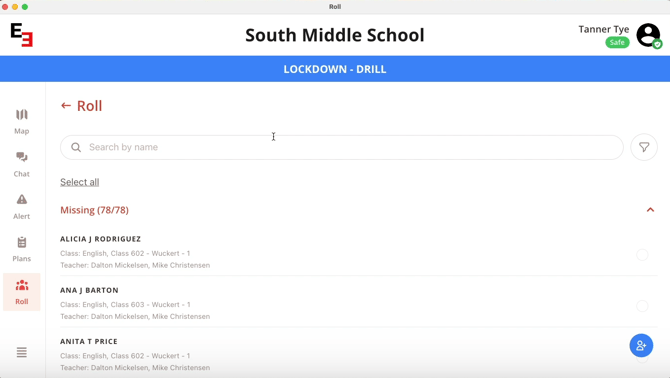
Step 4: Mark Students
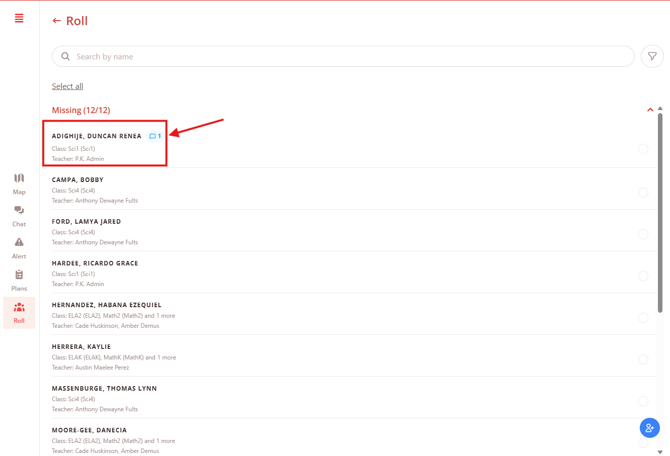
You will select the class or period for which class roster you would like to take roll for. After making a selecting all students are marked as Missing by default. You can account for students by tapping the circle by their name or by tapping on the name.
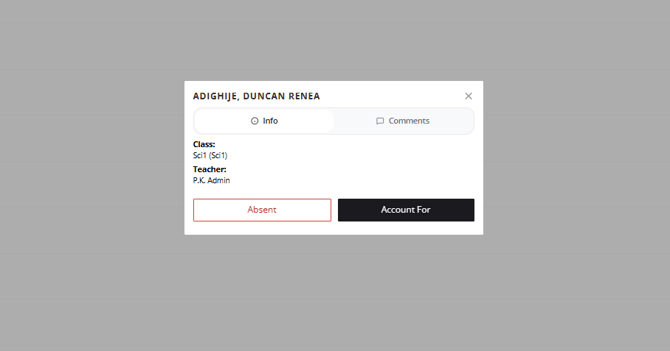
You can update each student’s status as follows:
- Absent - Will mark the student as accounted for with a "Absent" tag
- Account For - Will mark the student as accounted for
Note: All student, by default, are marked as missing
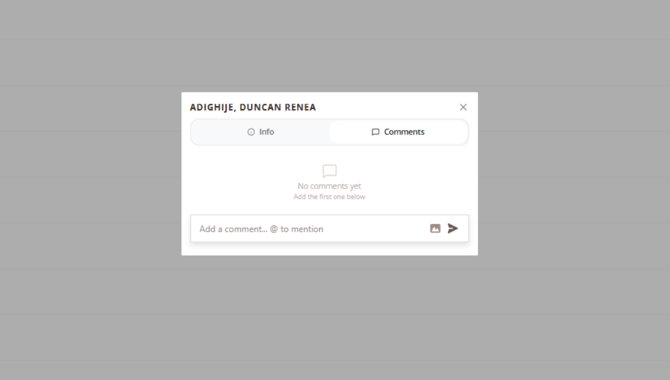
You can manage student comments during Roll Call as follows:
-
Comments Tab - Displays all comments and updates related to the selected student
- Add Comment - Allows users to type and submit notes or updates for the student
- @ Mention - Notifies specific users by tagging them in a comment
- Image Attachment - Allows users to attach an image to the comment
- Send Comment - Posts the comment to the student’s activity thread
Note: Comments are visible to users participating in the active Roll Call and can be used to share important updates or situational information in real time.
Once a comment is sent, a comment icon will appear beside the student’s name in the Roll Call list, indicating that additional information or updates have been added for that student.
Step 5: Quick Actions
-
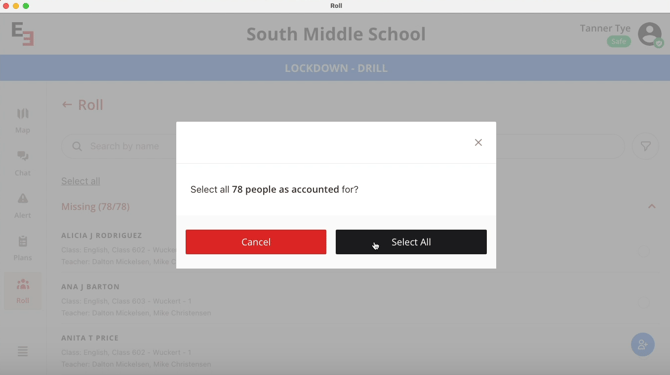
Select All → Accounted For: Quickly mark everyone as safe by tapping Select All. This moves all students from the missing section to the accounted for section.
-
Undo/Update: If a student’s status changes (for example, they’re found after being marked missing), tap their name again to update.
Tip: If you clicked the wrong period or class, you can click the filter icon and load a new roster. You can filter by class, period and/or teacher.
How to Preview Roll Call
The Preview Roll Call feature allows administrators to view what Roll Call will look like for each school before a live alert. It’s a safe way to verify student rosters, class schedules, and teacher assignments.
Step 1: Access Preview Roll Call
-
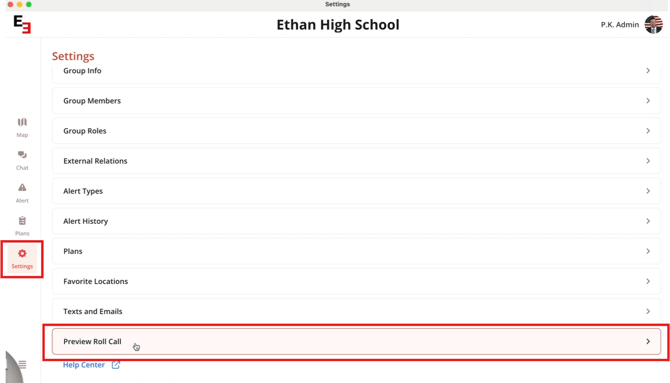
From the E3 main screen, click Settings.
- Scroll down and select Preview Roll Call.
Step 2: Select your class or period to take roll
- Pop up will prompt to select the class or period to filter your roster
- If you have schedules enabled. The preview only displays students in the current class period at the time you open it.
- Example: If it’s 11:50 AM, it will show Period 5 students.
- If opened at 2:00 PM, it may show Period 7 students, depending on your schedule setup.
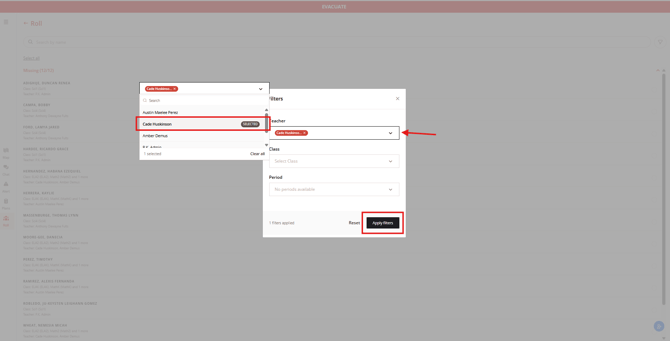
Step 3: Manually Filter the Preview
-
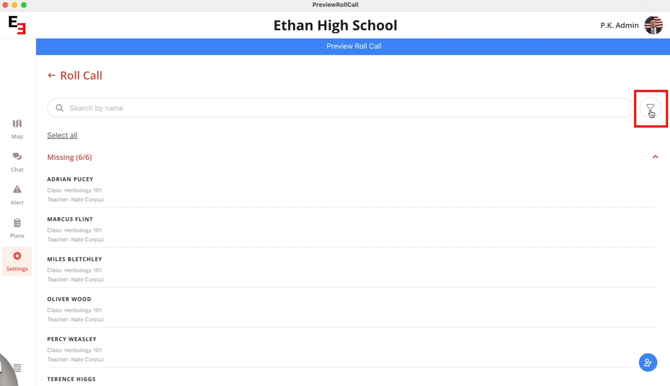
Tap the Filter button (top-right corner).
-
Choose whether to view by:
-
Teacher, or
-
Class/Period
-
-
For example, you can select Cade or Taylor Turner to view their active roster.
Step 4: View-Only Mode
-
Student names will appear with “Absent” or “Accounted For” options, but these buttons are disabled in preview mode.
-
The feature is read-only and does not affect live data.
Use this feature regularly to confirm that class rosters and schedule data are accurate before drills or emergencies occur.
How Roll Call Works for Admin Users
The Roll Call feature in E3 gives administrators full visibility and control during emergency situations. It enables you to monitor which teachers have taken attendance, track accounted-for students, and send reminders or reset the roll call process as needed — all in real time.
This guide explains how Roll Call works for admin users during alerts and where to access key controls.
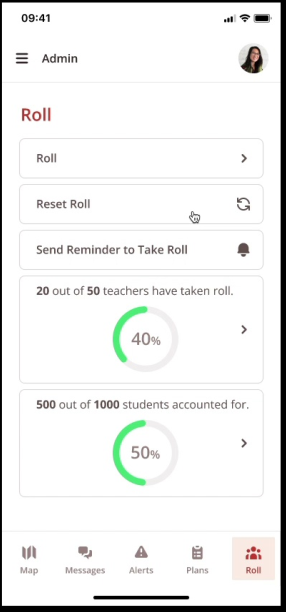
1. Roll Call Dashboard Overview
Admin users have access to a Roll Call Dashboard, which provides a live overview of Roll Call activity across the school.
From this dashboard, admins can see:
-
How many teachers have taken roll
-
How many students have been accounted for
Which teachers have and have not completed roll
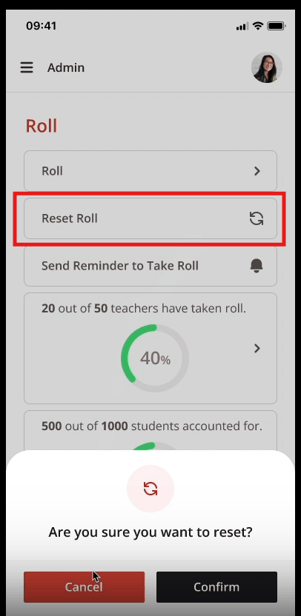
2. Resetting and Sending Reminders
Admins can manage Roll Call actions directly from the dashboard:
- Reset Roll: Allows staff to retake roll if needed (for example, if the situation changes). This resets all accountable for fields and starts everyone from scratch to take roll again.
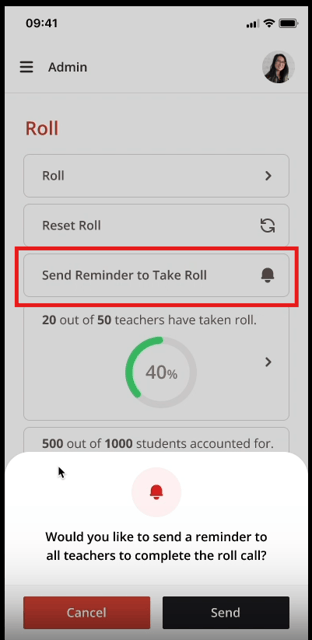
-
Send Reminder: Sends a notification to all teachers who haven’t yet completed their roll call.
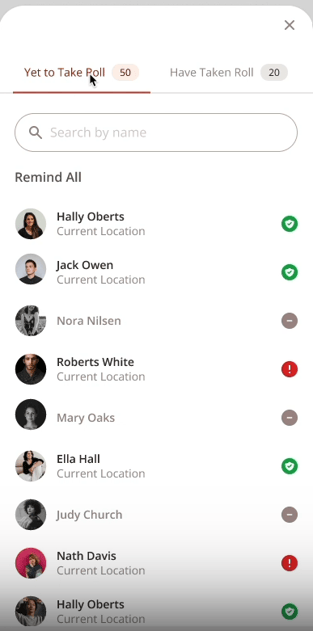
3. Roll Progress
- Quickly see who has taken roll. You can also see if those users have checked in to E3 with their status and location marked.
- Switch tabs to see who has not taken roll and if they have checked in to E3 as well.
How to Set Up Roll Call for Your Organization
This guide walks you through setting up Roll Call from start to finish — from SIS integration to configuring school schedules in E3. If you haven’t already, reach out to the E3 team to get the process started.
For detailed SIS connection instructions, reference this article:
How to Connect Your SIS System to E3
https://help.emergent3.com/how-to-connect-your-sis-system-to-e3
Step 1: Prepare for Roll Call Setup
Before you begin, make sure you’ve completed the initial setup steps.
Checklist:
-
Send the Roll Call setup email to your customer or school admin
-
SIS Integration Form is sent and completed
-
Confirm that your organization’s data source and schedule information are ready to upload
Once this is done, you’re ready to integrate SIS.
Step 2: Setting Up SIS Integration
The SIS (Student Information System) integration ensures each school’s schedules and rosters are automatically synced to E3.
Steps:
-
Confirm that the SIS Integration Form is complete (optional)
-
The E3 team will set up the Data Source.
-
You will receive a Connection Request to link the SIS to E3.

-
The E3 team will start the Stream to begin syncing data.
Tip: If you’re unsure which data source to use, contact your district IT or SIS administrator.
Step 3: Configure Rostering
Once the SIS is connected, configure rostering so E3 knows which users belong to which classes or groups.
Steps:
-
Log in to the E3 Admin Portal.
-
Make sure an Admin Account has been created.
-
Go to Integrations > Rostering and enable Rostering Integration.
-
Send the configuration link to your customer so they can map:
-
Map Groups
-
Schedules/Classes/Periods
-
Map Teachers
-
This ensures every student and staff member appears correctly during Roll Call.
Step 4: Input School Schedules in E3 (optional)
Once rostering is complete, it’s time to set up each school’s schedule.
Here’s how:
-
In the E3 Admin Portal, go to the list of schools.
-
On the right-hand side of each school’s name, click the dropdown menu.
-
Choose “Class Based” or “Period Based”, depending on how your SIS is structured:
-
Elementary Schools: Usually Class Based (e.g., by teacher/classroom)
-
Middle/High Schools: Usually Period Based (e.g., 1st Period, 2nd Period, etc.)
-
-
Click Add a Class or Add a Period.
-
Select from the available list — this data is pulled directly from your SIS.
-
For each class or period:
-
Select the days it runs
-
Set the start time and end time
-
Note: You’ll need to do this for each class or period. It can be a bit time-consuming, but it’s a one-time setup.
Step 5: Review and Test Roll Call
Once all schedules are set, you’re ready to test the Roll Call feature.
Checklist:
-
✅ All schedules are configured per school
-
✅ Rostering data is synced correctly
-
✅ Roll Call feature is enabled in the E3 app
Then:
-
Send the Roll Call Review Meeting link to your customer.
-
Test the Roll Call feature in the E3 app to ensure users can check in successfully.
Step 6: Completion
You’re all set!
Once you’ve confirmed that Roll Call is working as expected across your schools, your setup is complete.
Need more help?
💬 Chat with us.
Click the chat icon in the bottom-right corner of this page to connect with our team instantly.
✉️ Email us.
You can also send us an email at help@emergent3.com.